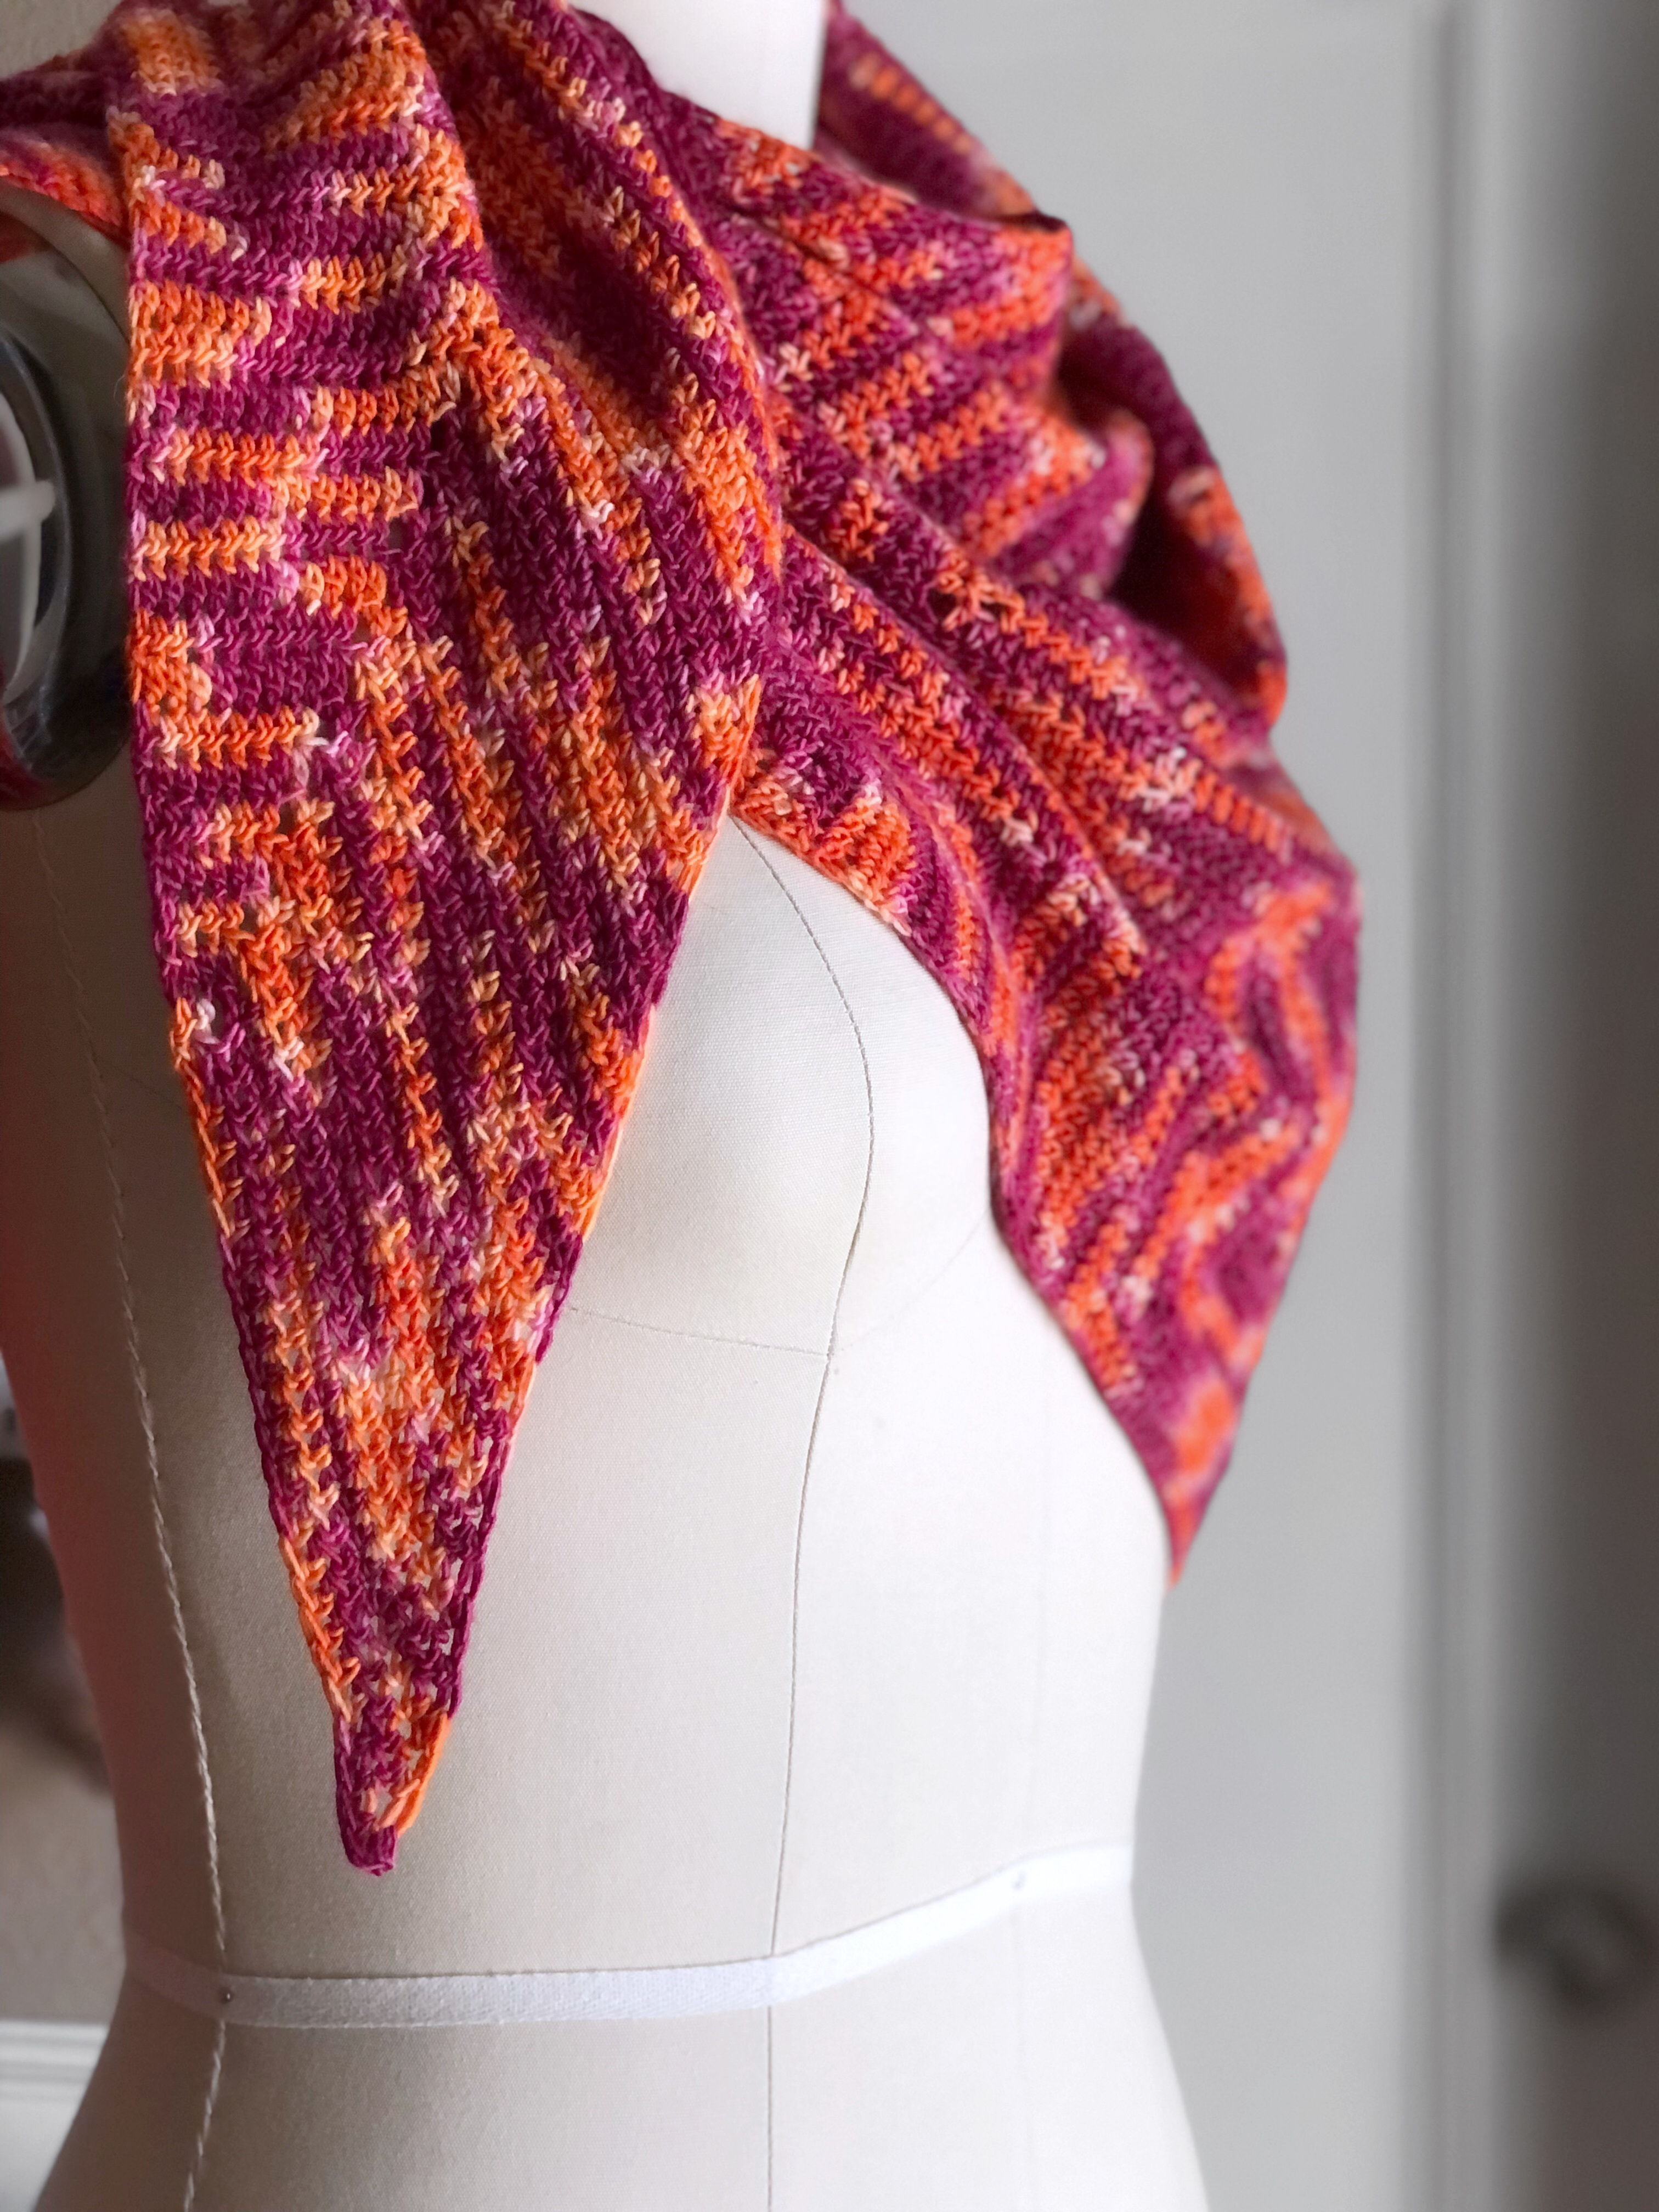
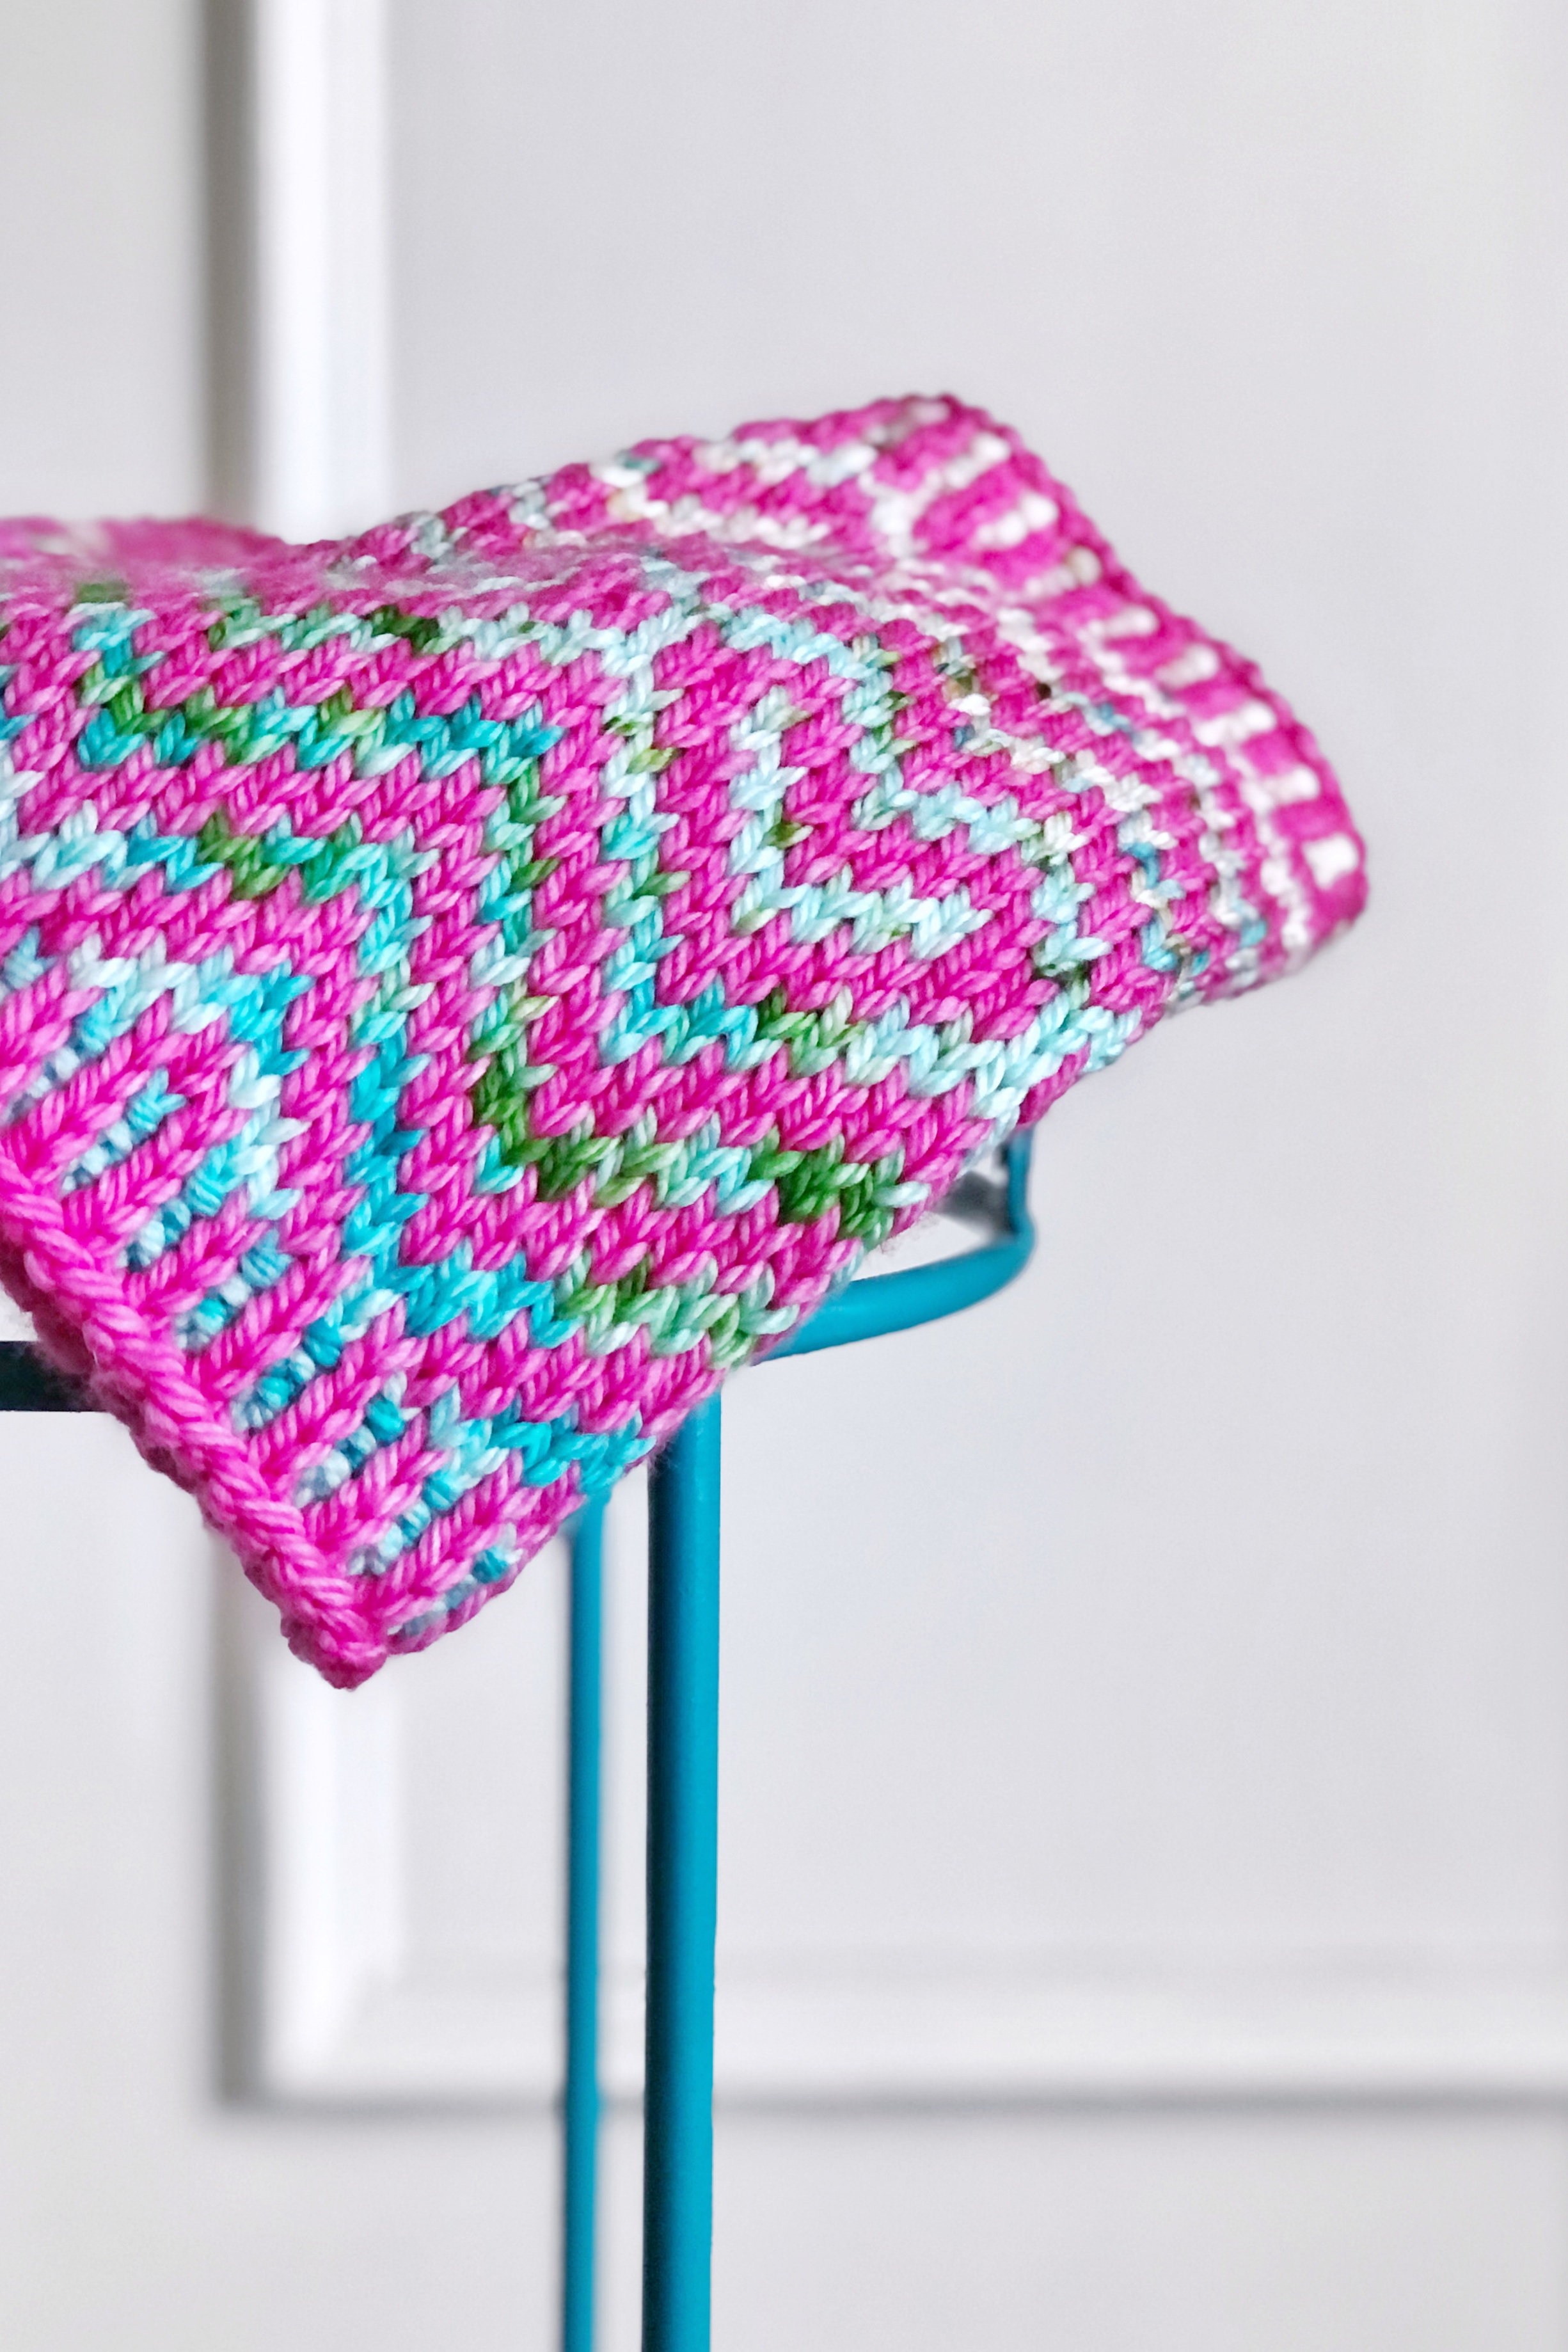
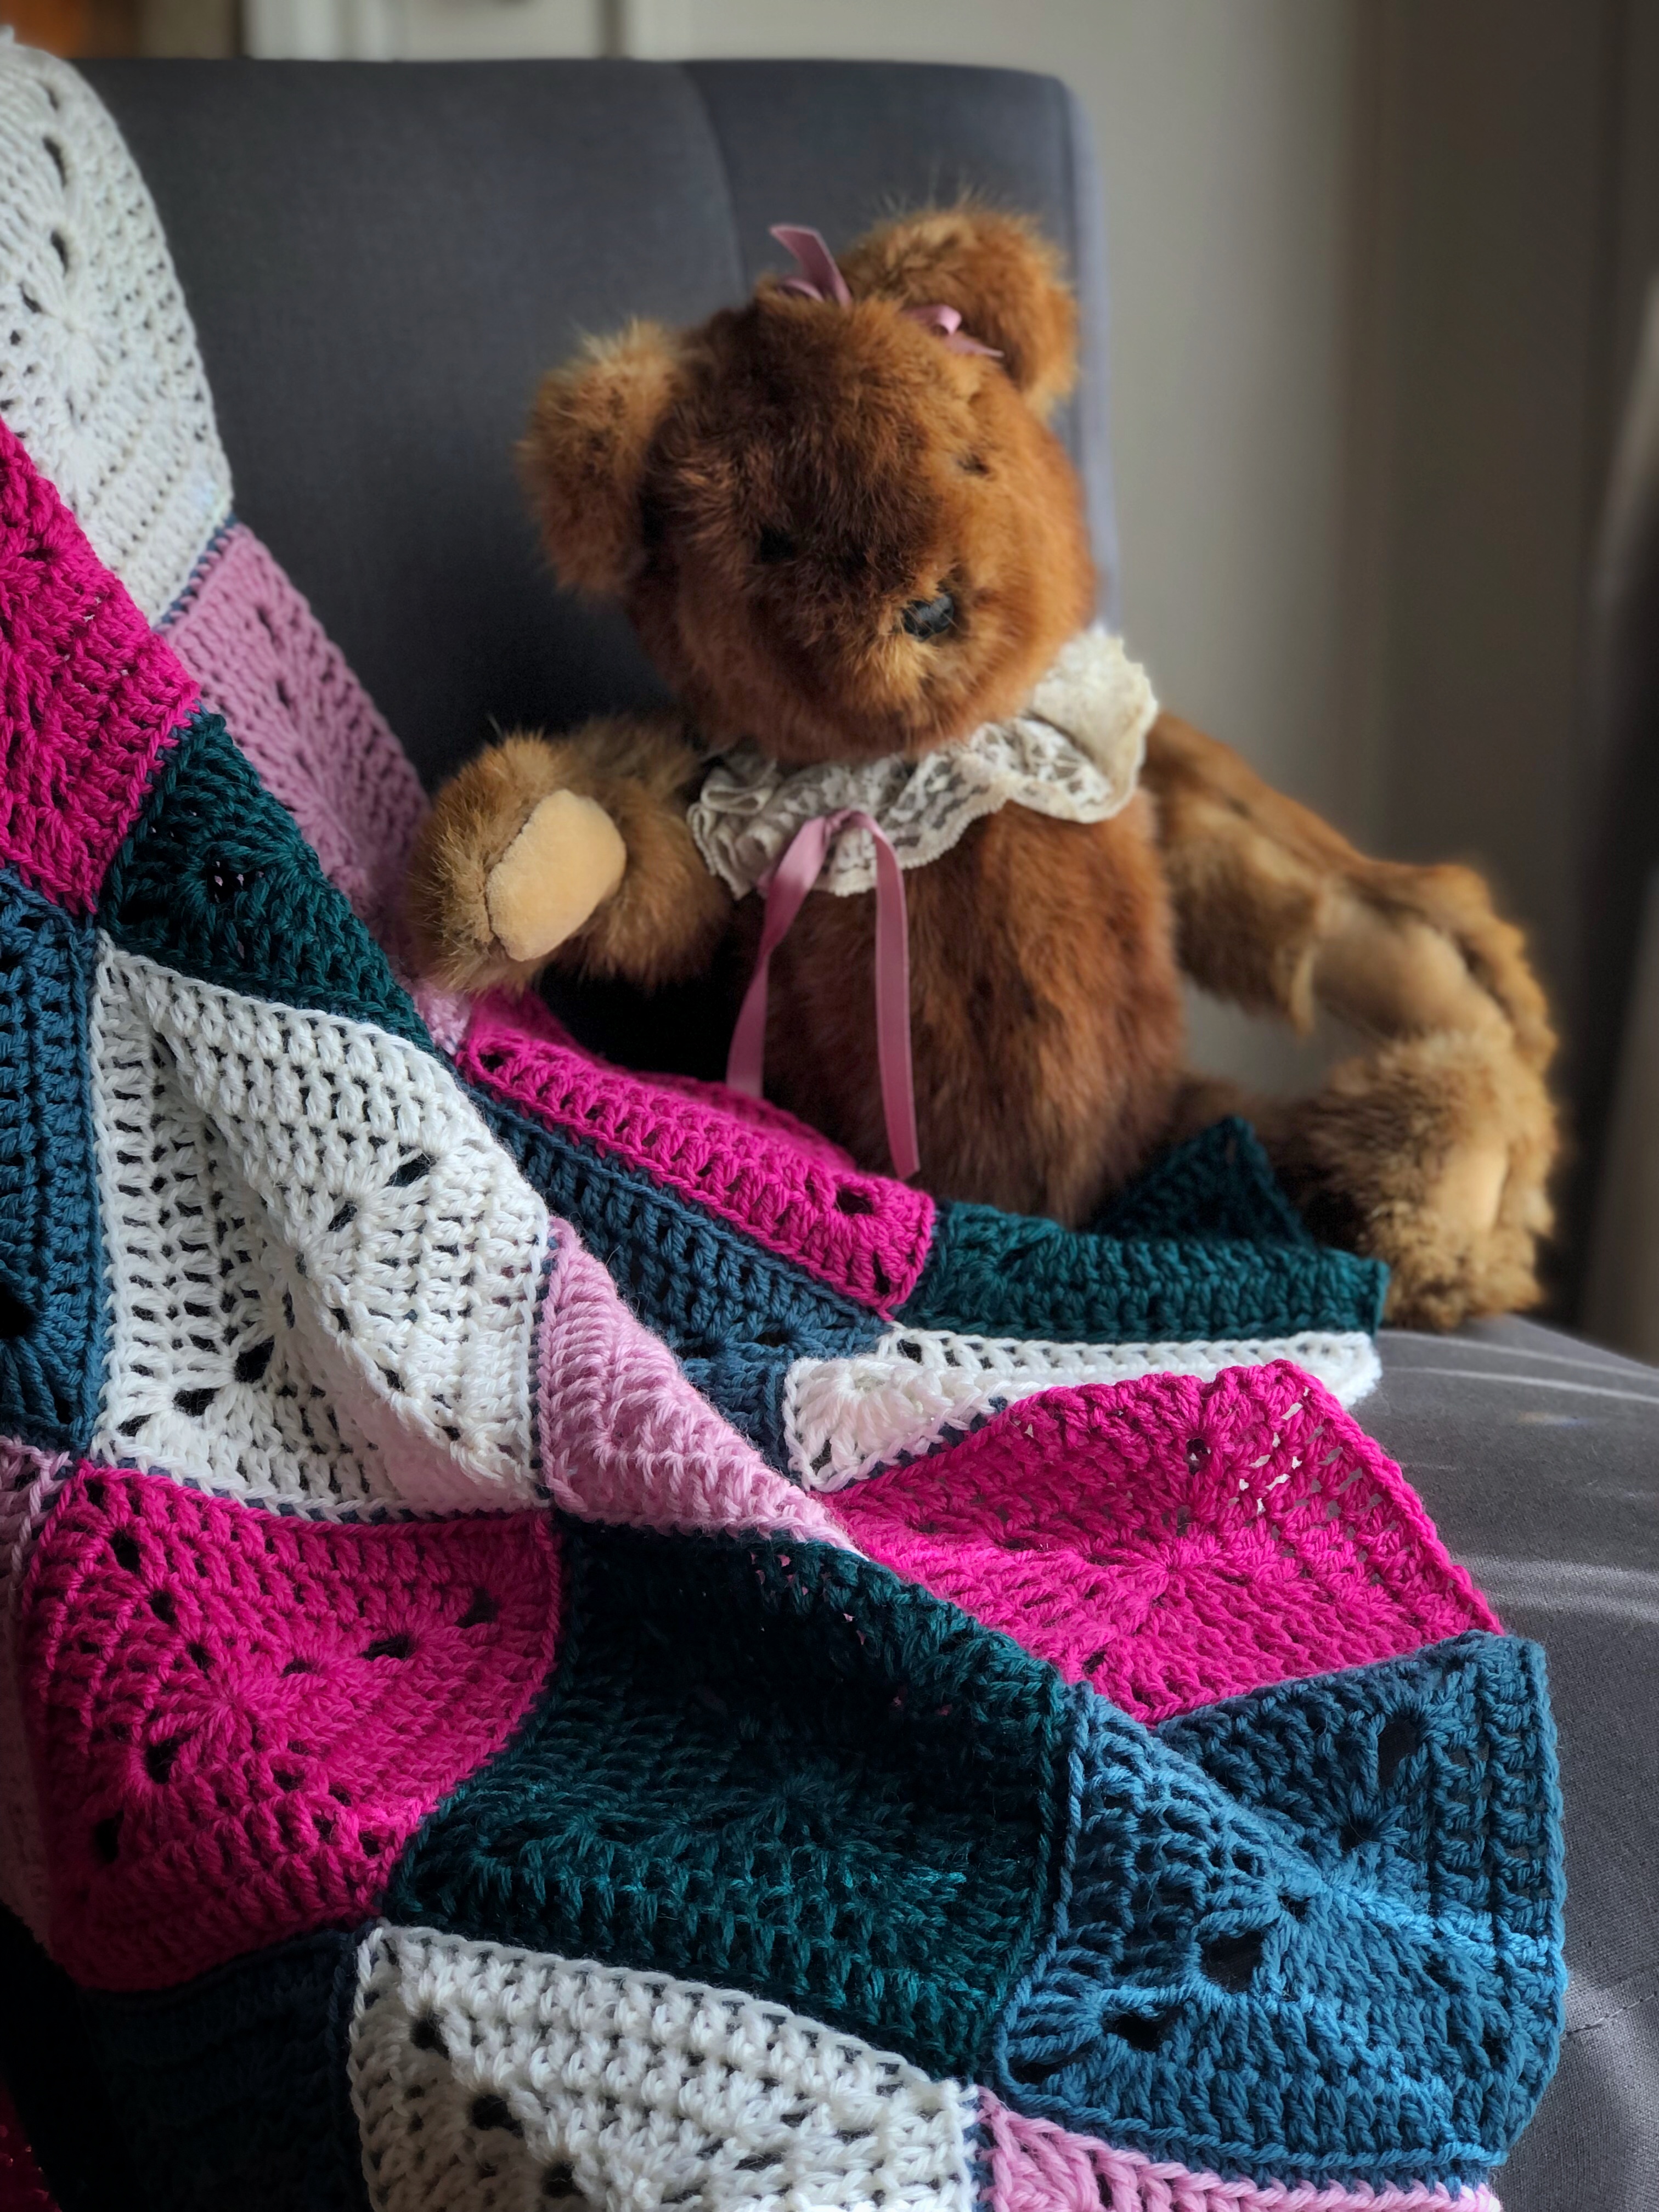
Thursday, November 12, 2009

Rudolph Hat

This pattern is the fifth in a series of cutesy holiday hats that I make for my nephew and cousins' kids each winter. I'm afraid this tradition will end soon though. The only uncertainty is whether it will be caused by the refusal of said children to participate in the cuteness as they age or by my inevitable drought of ideas. Only time will tell.

Materials:
Caron Simply Soft [100% acrylic; 330yds/302m per 6oz/170g skein); 1 skein in #9934 Chocolate, small amount in #2682 Red, small amount in #9703 Bone
US #8/5mm double-pointed needles, or 40-in/100-cm circular needle for magic loop
US #6/4mm double-pointed needles
Tapestry needle
Two 1-in/2.5-cm black buttons
Small amount of polyfil or scrap yarn
One wooden bead, about 7/8in or 2-1/4cm in diameter (can substitute more polyfil or scrap yarn)
Sewing needle and black thread

Gauge:
16.5sts x 22rows = 4in (10cm) in stst on larger needles

Finished Size:
0-3 months (3-6 months, 6-12 months, 1-3 years, 3-10 years) = 13 (14.5, 16, 17.5, 19)in [33 (37, 40.5, 44.5, 48)cm] head circumference, relaxed

Click here for Abbreviations

Pattern:
Hat:
With brown and larger needles, CO 54 (60, 66, 72, 78) sts. I used Ysolda's tubular cast-on for 1x1 rib (video here) because it gives a stretchy and professional-looking edge. If you choose this cast-on method, be sure to work both foundation rows before joining to work in the round.
Join and work in k1, p1 ribbing for 4 rnds, or about 1in/2.5cm.
Work stst for 11 (13, 15, 17, 18) rnds.
Crown Shaping:
Rnd 1: [k7 (8, 9, 10, 11), k2tog] 6 times.
Rnd 2 and all even rnds: knit.
Rnd 3: [k6 (7, 8, 9, 10), k2tog] 6 times.
Rnd 5: [k5 (6, 7, 8, 9), k2tog] 6 times.
Continue in this manner, decreasing 6 sts every other rnd until 24 sts remain.
Next rnd: k2tog around - 12 sts. Knit 1 rnd. k2tog around - 6 sts.
Cut yarn and thread tail through remaining sts. Pull tight and tie off. Weave in ends.

Antler Nubs: (make 2)
With tan and smaller needles, CO 12 sts, leaving a long tail for sewing onto hat later.
Join and knit 8 rnds in stst. k2tog around - 6 sts.
Cut yarn and thread tail through remaining sts. Pull tight and tie off. Hide BO tail inside antler.

Ears: (make 2)
With brown and smaller needles, CO 8 sts, leaving a long tail for sewing onto hat later.
Row 1: sl1, p1, k1, p2, k1, p1, k1.
Row 2: sl1, k1, p1, k2, p1, k2.
Row 3: sl1, p1, kfb, p1, pfb, k1, p1, k1.
Row 4: sl1, k1, p1, k4, p1, k2.
Row 5: sl1, p1, kfb, p3, pfb, k1, p1, k1.
Row 6: sl1, k1, p1, k6, p1, k2.
Row 7: sl1, p1, k1, p6, k1, p1, k1.
Row 8: sl1, k1, p1, k6, p1, k2.
Row 9: sl1, p1, ssk, p4, k2tog, p1, k1.
Row 10: sl1, k1, p1, k4, p1, k2.
Row 11: sl1, p1, k1, p4, k1, p1, k1.
Row 12: sl1, k1, p1, k4, p1, k2.
Row 13: sl1, p1, ssk, p2, k2tog, p1, k1.
Row 14: sl1, k1, p1, k2, p1, k2.
Row 15: sl1, p1, k1, p2, k1, p1, k1.
Row 16: sl1, k1, p1, k2, p1, k2.
Row 17: sl1, p1, ssk, k2tog, p1, k1.
Row 18: sl1, k1, p2, k2.
Row 19: sl1, k2tog, ssk, k1, do not turn. Slide sts to other end of dpn, as if to knit i-cord.
Row 20: k4, do not turn. Slide sts to other end of dpn.
Row 21: k2tog, twice, slip first st over second and off needle to BO.
Cut yarn and tie off. Weave in BO end.

Nose:
With red and smaller needles, CO 3 sts, leaving a long tail for sewing onto hat later.
Slide sts to other end of dpn to begin working in the round.
Rnd 1: kfb 3 times - 6 sts. Distribute sts to three dpns.
Rnd 2: kfb 6 times - 12 sts.
Rnd 3: knit.
Rnd 4: [kfb, k1] around -18 sts.
Rnds 5-7: knit.
Rnd 8: [k1, k2tog] around - 12 sts.
Rnd 9: knit.
Insert wooden bead or stuff with polyfil.
Rnd 10: k2tog around - 6 sts.
Cut yarn and thread tail through remaining sts. Pull tight and tie off. Hide BO tail inside nose.

Finishing:
Sew on ears and nose. I used the snippings from these ends to stuff antlers, or you can use polyfil. Sew on antlers. Weave in any remaining ends. Sew on button eyes with sewing needle and thread.


Feel free to comment here with questions.

This pattern is intended for personal use only. Please do not try to sell it or any product made from it. Thank you.

Friday, September 04, 2009

Souvenir Socks

It is that time of year when summer vacations are coming to an end and we all must get back to our daily lives and routines. But with these socks, you can keep a piece of summer with you through the rest of the year, in remembrance of those carefree days spent lying on the beach. This pattern is begun at the center of the sand dollar and worked outward; then short-rows are used to complete the toe, before sailing through the remainder of a simple stockinette stitch sock.

Buy on Ravelry!

Materials:
Knit Picks Gloss [70% Merino Wool, 30% Silk; 220yds/201m per 1.76oz/50g skein]: color: Serengeti; two skeins
Set of US#1/2.25mm double-pointed needles
Set of US#0/2.00mm double-pointed needles
Stitch marker
Tapestry needle

Finished Measurements:
Foot circumference = 8in/20cm
Foot length = adjustable

Gauge:
32 sts/43 rows = 4in/10cm in stockinette stitch

Tuesday, August 18, 2009

Vice Versa Socks

Though they begin in a familiar way, these are not your typical toe-up socks. The feet are worked on the bias; then short-row wedges and a heel flip the bias to the opposite direction for the leg. Self-striping and variegated yarns work very well to showcase the unusual construction in this pattern.

Buy on Ravelry!

Materials:
Wisdom Yarns Los Angeles [75% Wool, 25% Nylon; 437yds/400m per 3.5oz/100g skein]: color: #246; one skein
Set of US#1/2.25mm double-pointed needles
Stitch markers
Tapestry needle

Finished Measurements:
Foot circumference = 8in/20cm
Foot length = adjustable

Gauge:
34 sts/46 rows = 4in/10cm in stockinette stitch

Tuesday, August 04, 2009

Divergent Socks

Another sock construction experiment, these begin at the heel with a small square and are increased outward before splitting in two for the foot and the leg. The varying stitch-counts create an interesting effect with variegated yarns.

Buy on Ravelry!

Materials:
Berroco Sox [75% Wool, 25% Nylon; 440yds/402m per 3.5oz/100g skein]: color: #1480 Day-Lewis; one skein
Set of US#1/2.25mm double-pointed needles, or long circular needle
Set of US#0/2.00mm double-pointed needles, or long circular needle
Small crochet hook
Waste yarn
Tapestry needle

Finished Measurements:
Foot circumference = 8in/20cm
Foot length = adjustable

Gauge:
34 sts/45 rows = 4in/10cm in stockinette stitch with larger needles

Thursday, July 16, 2009

Boxcars Socks

I adore Norah Gaughan and her use of hexagons. I'd like to think she'd appreciate these socks. They are constructed not from the cuff down, nor from the toe up, but from the center out. After the hexagon is knitted, stitches are cast on at the heel and worked down to the toe. Then stitches are picked back up at the heel and worked up the leg.

Buy on Ravelry!

Materials:
Lion Brand Sock-Ease [75% Wool, 25% Nylon; 438yds/401m per 3.5oz/100g skein]: color: #205 Cotton Candy; one skein
Set of US#1/2.25mm double-pointed needles, or long circular needle
Set of US#0/2.00mm double-pointed needles, or long circular needle
Small crochet hook
Waste yarn
Tapestry needle

Finished Measurements:
Foot circumference = 8in/20cm
Foot length = adjustable

Gauge:
32 sts/44 rows = 4in/10cm in stockinette stitch with larger needles

Sunday, March 29, 2009

Camisa del Sol

We recently had a warm front come through Texas, bringing the temperature up to the mid-80s (about 30 degrees Celsius)... in March! This, of course, made me think of how dreadfully hot it will be in August. So I thought I'd get a jump on my summer wardrobe with a cute cotton top. It may be a little later in the year before you can wear this in your neighborhood, but that just gives you time to knit leisurely. Some basic sewing skills are required, but don't be frightened - it's not too bad.

Queue this on Ravelry!

Materials:
Omega Sinfonia [100% mercerized cotton; 218yds/200m per 3.5oz/100g skein]; 1 (1, 1, 1, 1, 1, 2, 2) skeins in color of your choice
[Sample A was knit with #828 Lila; Sample B was knit with #832 Turquesa]
US #4/3.5mm 24-in/60-cm circular needle
Five stitch markers
Tapestry needle
About 1yd/1m of cotton print fabric
Elastic, long enough to go around your ribcage, just under your boobs
[I used elastic 1-inch wide, but if you have some 1/2-inch on hand, feel free to use it.]

Finished Measurements:
Under-Bust: 30 (32, 34, 36, 38, 40, 42, 44)in/76 (81, 86, 91, 97, 102, 107, 112) cm
Cup Size: A {B, C, D, DD} cup sizes, where the difference between bust and under-bust measurements is 1 {2, 3, 4, 5}in/2.5 {5, 7.5, 10, 12.5}cm
Length: Custom

Gauge:
20 sts/28 rows = 4in/10cm in stockinette stitch, slightly stretched

Click here for Abbreviations

Pattern:
CO 150 (160, 170, 180, 190, 200, 210, 220) sts using backwards loop, or single cast-on, method. Join to work in round, being careful not to twist your stitches.
Rnds 1, 3, 5: Purl.
Rnds 2, 4: Knit.
Rnd 6: pm for beg of rnd/left underarm, k19 (20, 22, 23, 24, 25, 27, 28), pm for first set of bust increases, k19 (20, 21, 22, 24, 25, 26, 27), pm for center front, k19 (20, 21, 22, 24, 25, 26, 27), pm for second set of bust increases, k19 (20, 22, 23, 24, 25, 27, 28), pm for right underarm, k to end.
Rnd 7: [k to 1 st before bust marker, m1R, k1, sm, k1, m1L] twice, k to end.
Rnds 8, 9: Knit.
Repeat last 3 rnds 1 {2, 3, 4, 5} more times for a cup size of A {B, C, D, DD}.

Short-Row Bust Darts (optional):
Note: If you choose not to do the bust darts, you may still want to knit even for 4 {6, 8, 10, 12} rnds for a cup size of A {B, C, D, DD} in order to get about the same amount of coverage in front.
Row 1: k to 2 sts after second bust marker, w&t.
Row 2: p to 2 sts after other bust marker, w&t.
Row 3: k to wrapped st, k wrap tog with wrapped stitch (insert right needle up through wrap, then through st and knit both tog), k2, w&t.
Row 4: p to wrapped st, p wrap tog with wrapped stitch (insert right needle up through wrap from the back side of work, then through st and purl both tog), p2, w&t.
Repeat last 2 rows 0 {1, 2, 3, 4} more times for a cup size of A {B, C, D, DD}.
Next rnd: k to wrapped st, k wrap tog with wrapped stitch, k to end of rnd, do not turn.
Next rnd: repeat previous rnd to incorporate final wrap.

Begin Edging:
Rnd 1: k1, m1Lp, ssk, k to 3 sts before center marker, k2tog, m1Rp, k1, sm, k1, m1Lp, ssk, k to 3 sts before side marker, k2tog, m1Rp, k1, sm, p to end.
Rnd 2: k1, m1L, p1, ssk, k to 4 sts before center marker, k2tog, p1, m1R, k1, sm, k1, m1L, p1, ssk, k to 4 sts before side marker, k2tog, p1, m1R, k1, sm, k to end.
Rnd 3: k1, m1Lp, k1, p1, ssk, k to 5 sts before center marker, k2tog, p1, k1, m1Rp, k1, sm, k1, m1Lp, k1, p1, ssk, k to 5 sts before side marker, k2tog, p1, k1, m1Rp, k1, sm, p to end.
Rnd 4: k1, m1L, p1, k1, p1, ssk, k to 6 sts before center marker, k2tog, p1, k1, p1, m1R, k1, sm, k1, m1L, p1, k1, p1, ssk, k to 6 sts before side marker, k2tog, p1, k1, p1, m1R, k1, sm, k to end.
Rnd 5: k1, m1Lp, , [k1, p1] twice, ssk, k to 7 sts before center marker, k2tog, [p1, k1] twice, m1Rp, k1, sm, k1, m1Lp, [k1, p1] twice, ssk, k to 7 sts before side marker, k2tog, [p1, k1] twice, m1Rp, k1, remove marker, BO all back sts as if to purl, remove marker.
Note: You'll still have one st on your right needle from the last BO st.

Left Front:
Row 1: Slip last st from BO back to left needle and k it tog with first st of next row, p1, [k1, p1] twice, k to 8 sts before center marker, k2tog, [p1, k1] 3 times, remove marker, turn.
Row 2: sl1, [k1, p1] twice, k1, p2tog, p to last 8 sts, ssp, [k1, p1] twice, k2.
Row 3: sl1, [p1, k1] twice, p1, ssk, k to last 8 sts, k2tog, [p1, k1] 3 times.
Repeat last 2 rows until 14 or 15 sts remain.
If you have 14 sts and your next row is a RS row: sl1, [p1, k1] twice, p1, k2tog, [p1, k1] 3 times.
If you have 14 sts and your next row is a WS row: sl1, [k1, p1] twice, k1, p2tog, [k1, p1] 3 times.
If you have 15 sts and your next row is a RS row: sl1, [p1, k1] twice, p1, ssk, slip this st back to left needle, pass next st over, return to right needle, [p1, k1] 3 times.
If you have 15 sts and your next row is a WS row: sl1, [k1, p1] twice, k1, sl1, ssp, pass slipped st over, [k1, p1] 3 times.
Continue in k1, p1 ribbing for roughly 12-18in/30-45cm. Since this is so closely fitted, you really need to try it on when you think you're getting close and make sure your straps are the right length. BO all sts.

Right Front:
With RS facing, join yarn at center front. Work as for Left Front except for the last decrease row:
If you have 14 sts and your next row is a RS row: sl1, [p1, k1] twice, p1, ssk, [p1, k1] 3 times.
If you have 14 sts and your next row is a WS row: sl1, [k1, p1] twice, k1, ssp, [k1, p1] 3 times.
If you have 15 sts and your next row is a RS row: sl1, [p1, k1] twice, p1, sk2p, [p1, k1] 3 times.
If you have 15 sts and your next row is a WS row: sl1, [k1, p1] twice, k1, p2tog, slip this st back to left needle, pass next st over, return to right needle, [k1, p1] 3 times.

Finishing:
Sew straps to top of back band roughly a quarter of the way in from each underarm. Weave in ends.

Sewing:
Measure around your hips, and add 1in/2.5cm. Also measure from just under your bust to however long you want your top, and add 3in/8cm. Cut a peice of fabric that size. Depending on your hip size and the width of your fabric, you may need to cut two pieces, each half you hip size plus 1in/2.54cm.
Fold fabric in half with right sides together and sew side seam(s) to form a tube.
Fold bottom edge over and sew hem.
Wrap elastic around your ribcage, just under your boobs and pull snug, but not too tight. Cut elastic to that length.
Fold top of fabric down to form elastic casing and sew almost all the way around, leaving a gap to insert elastic.
Feed elastic through casing, and sew end-to-end.
Pin fabric (right-side out) to underside of bottom garter stitch border on knitted piece, and sew all the way around through knitting, fabric and elastic. You'll want to use a zig-zag stitch to make sure it will stretch enough to get over your head and shoulders.
Block knitting and/or iron fabric, if desired.

Other Ideas:
- You could lengthen the fabric portion to make this into a dress/swimsuit cover-up.
- I think this would look really cute if the fabric portion were a patchwork of various prints.

Feel free to comment here with questions.

This pattern is intended for personal use only. Please do not try to sell it or any product made from it. Thank you.

Thursday, March 12, 2009

Ipod Armband

My friend requested an armband to hold her ipod while she works out. This is what I came up with. The yarn's inherent elasticity, coupled with a twisted rib, makes this very stretchy to fit a variety of arm sizes. The pocket was designed to hold a 2nd generation ipod shuffle, but could easily be made bigger or smaller to accommodate your favorite music device.

Queue this on Ravelry!

Materials:
Patons Katrina [92% rayon, 8% polyester; 163yds/150m per 3.5oz/100g skein]; about 25 yds/23m in color of your choice
[Sample was knit with #10217 Frost]
Set of US #6/4mm double pointed needles or one long circular needle for magic loop method
Tapestry needle

Finished Measurements:
Width: 2.5in/6cm
Circumference: 7in/18cm, unstretched, up to 13in/33cm when fully stretched
Pocket: 1.5in/4cm squared, unstretched

Gauge:
14 sts/16 rows = 2in/5cm in twisted rib, unstretched

Click here for Abbreviations

Pattern:
Band:
CO 50 sts using long-tail tubular cast-on (or any stretchy cast-on you like).
Join and work k1 tbl, p1 ribbing for 20 rounds (after foundation rows if you used the tubular CO).
BO all sts using tubular bind-off (or stretchy bind-off method of your choice).

Pocket:
CO 10 sts with tubular cast-on. Work foundation rows.
Next RS Row: sl1, [k1 tbl, p1] 4 times, k1.
Next WS Row: sl 1, [k1, p1 tbl] 4 times, k1.
Repeat these two rows 4 more times. BO using tubular bind-off, leaving a long tail.

With BO tail, sew pocket onto band along three sides. Weave in ends. Go rock out on the treadmill.

Feel free to comment here with questions.

This pattern is intended for personal use only. Please do not try to sell it or any product made from it. Thank you.

Monday, October 13, 2008

Heelhead Scarf

While brain-storming ways to add a hood to a scarf, I had an epiphany. Why not use short-rows to make the scarf flare out for the hood and then narrow again afterward? Like the heel of a sock, but for your head. Brilliant! It shall be done.
Lion Brand Wool-Ease Worsted [20% wool, 80% acrylic; 197yds/180m per 3oz/85g skein]; three skeins in color of your choice
[Sample was knit with three skeins of 107 Blue Heather]
Pair of US #9/5.5mm straight needles or one circular needle
Two stitch markers
Tapestry needle

Finished Measurements:
Scarf Length = 45in/114cm
Scarf Width = 4in/10cm
Hood Width = 13in/33cm at widest point, 6in/15cm at top

Gauge:
17 sts/24 rows = 4in/10cm in stockinette stitch

Click here for Abbreviations

Special Abbreviations:
s2sk = sl2 tog as if to knit, sl1 as if to knit, k3tog tbl = insert right needle into next 2 stitches as if to knit them together, but just slip them to right needle, insert right needle into next stitch as if to knit, but just slip it to right needle, insert left needle from left to right through all three stitches and knit all together through back loop
m1L = make 1 left-leaning = insert left needle from front to back under bar between next two stitches and knit it through back loop
m1R = make 1 right-leaning = insert left needle from back to front under bar between next two stitches and knit it
m1Lp = make 1 left-leaning = insert left needle from front to back under bar between next two stitches and purl it through back loop
m1Rp = make 1 right-leaning = insert left needle from back to front under bar between next two stitches and purl it

Pattern:
First Tail:
CO 23 sts.
Rows 1-5, 7, 9: sl1, p21, k1.
Rows 6, 8: sl1, p4, k4, p5, k4, p4, k1.
Row 10: sl1, p4, FC4, p5, BC4, p4, k1.
Repeat Rows 5-10 49 more times, or until scarf reaches from shoulder to desired length. Repeat Rows 5-7 once more.

Increase Rows:
Row 1: sl1, p4, k4, m1Lp, p5, m1Rp, k4, p4, k1 - 25 sts.
Even Rows: sl1, p to last st, k1.
Row 3: sl1, p4, FC4, m1Lp, p7, m1Rp, BC4, p4, k1 - 27 sts.
Row 5: sl1, p4, k4, m1Lp, p4, pm, k1, pm, p4, m1Rp, k4, p4, k1 - 29 sts.
Rows 7, 11: sl1, p4, k4, p5, sm, m1L, k to next marker, m1R, sm, p5, k4, p4, k1 - 2 sts inc'd each time.
Row 9: sl1, p4, FC4, p5, sm, m1L, k to next marker, m1R, sm, p5, BC4, p4, k1 - 2 sts inc'd each time.
Repeat Rows 7-12 until there are 75 sts total, ending after Row 10.

Decreasing Short-Rows:
Row 1: sl1, p4, k4, p5, sm, k46, turn.
Row 2: yo-b, p45, turn.
Row 3: yo, k44, turn.
Row 4: yo-b, p43, turn.
Row 5: yo, k42, turn.
Row 6: yo-b, p41, turn.
Row 7: yo, k40, turn.
Row 8: yo-b, p39, turn.
Continue in this manner, knitting/purling one fewer st each row, until...
Row 21: yo, k26, turn.
Row 22: yo-b, p25, turn.

Increasing Short-Rows:
Row 1: yo, k25, am, k2tog, turn.
Row 2: yo-b, p26, ssp, turn.
Row 3: yo, k27, am2, k3tog, turn.
Row 4: yo-b, p28, sssp, turn.
Row 5: yo, k29, am2, k3tog, turn.
Row 6: yo-b, p30, sssp, turn.
Row 7: yo, k31, am2, k3tog, turn.
Row 8: yo-b, p32, sssp, turn.
Continue in this manner, knitting/purling one more st each row, until...
Row 21: yo, k45, am2, k3tog, turn.
Row 22: yo-b, p46, sssp, turn.
Row 23: yo, k47, am, p2tog, (remove marker & replace before p2tog), p4, k4, p4. k1.
Row 24: sl1, p to 1 st before second marker, ssp (remove marker & replace before ssp), p to last st, k1.
You should now have only 75 sts again.

Decrease Rows:
Row 1, 5: sl1, p4, k4, p5, sm, k2tog, k to 2 sts before next marker, ssk, sm, p5, k4, p4, k1 - 2 sts dec'd each time.
Even Rows: sl1, p to last st, k1.
Row 3: sl1, p4, FC4, p5, sm, k2tog, k to 2 sts before next marker, ssk, sm, p5, BC4, p4, k1 - 2 sts dec'd each time.
Repeat Rows 1-6 until there are 31 sts remaining, ending after Row 2.
Row 45: sl1, p4, FC4, p5, remove marker, s2sk, p5, BC4, p4, k1 - 29 sts.
Even Rows, 46-52: sl1, p to last st, k1.
Row 47:sl1, p4, k4, p2tog, p7, ssp, k4, p4, k1 - 27 sts.
Row 49: sl1, p4, k4, p2tog, p5, ssp, k4, p4, k1 - 25 sts.
Row 51: sl1, p4, FC4, p2tog, p3, ssp, BC4, p4, k1 - 23 sts.

Second Tail:
Rows 1, 3: sl1, p4, k4, p5, k4, p4, k1.
Even Rows: sl1, p to last st, k1.
Row 5: sl1, p4, FC4, p5, BC4, p4, k1.
Repeat Rows 1-6 49 more times, or until scarf reaches same length as first tail.
Repeat Rows 1-2 once more.
Repeat Row 2 three more times.
BO all sts and cut yarn. Weave in ends. Block if desired.

Modification Ideas:
- Add fringe
- Exchange the simple cable for a more intricate design
- For a pointy-er hood, work more short-rows; for a less pointy hood, work fewer short-rows
- Add a pom-pom on the top of the hood
- Make the tails shorter, tie them together, turn it upside down and you've got a shoulder bag

Feel free to comment here with questions.

This pattern is intended for personal use only. Please do not try to sell it or any product made from it. Thank you.

Monday, June 23, 2008

Riptide Socks

These socks are knitted from the toe up and feature short-row heels and a twisted-stitch pattern that swells and recedes like the tides. Plus, the twisted stitches give the socks extra stretchiness!


Buy/Queue on Ravelry!

Materials:
Louet Gems Fingering Weight [100% wool; 185yds/169m per 1.76oz/50g skein]; two skeins in color of your choice
[Sample was knit with two skeins of Caribbean Blue]
Set of US #2/2.75mm double-pointed needles
Set of US #1/2.25mm double-pointed needles
Tapestry needle

Finished Measurements:
Foot circumference = 8in/20cm, relaxed
Foot length = approximately 10in/25cm, but can be adjusted by working more or less of
chart before beginning heel

Gauge:
30 sts/40 rows = 4in/10cm in stockinette stitch with larger needles

Saturday, December 15, 2007

Starbucks Coffee Cozy

I'm a barista at Starbucks. I showed my manager my POISON! Coffee Cozy, and she loved it. In fact, she commissioned me to make one for her sister, only she wanted it to look like the cardboard sleeve that Starbucks puts on their hot drinks. And thus, this pattern was born.

The logo is done using intarsia. I wish I'd found a better green, but at my LYS, I had a choice between this and lime green. I split a length of black yarn into its plies and used one ply to embroider the check boxes on the back. Then I used two plies together to add a "3" in the shots blank and an "A" in the drink blank to signify a Triple Tall Caffe Americano, Robyn's sister's favorite drink. They got obscured a bit during felting, but you get the gist. Feel free to customize it with your own drink of choice.

Queue this on Ravelry!

Materials:
Cascade 220 Wool (100% Peruvian Highland Wool, 3.5oz/100g, 220yds/201m); 1 skein each in 8555 Black and 8894 Green
Cascade 220 Heathers (100% Peruvian Highland Wool, 3.5oz/100g, 220yds/201m); 1 skein in 2442 Beige (and I used a skein of 9447 Forest Green in lieu of the better green I wanted)
[Note: You'll probably only need about 50 yards of the Beige and even less of the Green and Black, so if you've got leftovers from another project, feel free to use them up]
US 8 (5mm) needles
Tapestry Needle

Gauge:
18sts by 24rows= 4in (10cm) in stst, pre-felting
20sts by 27rows= 4in (10cm) in stst, post-felting

Finished Size:
3.5in (8.5cm) tall by 10in (25cm) around, pre-felting
3in (7.5cm) tall by 9in (23cm) around, post-felting

Click here for Abbreviations

Pattern:
With Beige, CO 48 sts.
Rows 1, 2, 4: sl1, k to end.
Rows 3, 5: sl1, p to last st, k1.
Rows 6-18: Work colorwork according to chart. Slip first st of every row and knit last st of every row.
Rows, 19, 21, 23: With Beige, sl1, p to last st, k1.
Rows 20, 22: With Beige, sl1, k to end.
BO purlwise on RS with Beige. Cut yarn, leaving a tail long enough to seam later.

Cut a strand of Black yarn, about a yard long, and separate one ply. Use it and a tapestry needle to embroider check boxes. Separate two more plies, and use them to embroider drink code. Ask your friendly local barista if you need help with the code. Use BO tail to sew rectangle into a tube. Weave in ends.


Handwash in hot water with a little dish soap and agitation until it felts to appropriate size. Rinse thoroughly. Blot with towel to absorb excess moisture. Stretch over a glass or plastic cup. Allow to dry completely before use. Go to your local Starbucks and show off your new creation.

Feel free to comment here with questions.

This pattern is intended for personal use only. Please do not try to sell it or any product made from it. Thank you.